1997 BMW 540i Car Audio Project
I replaced the complete audio system in my 1997 540i (w/DSP), but kept the factory non-navigation head unit to keep the steering wheel controls and MID.
I didn't get very expensive or ultra high-end equipment, because I'm always on a strict budget, and I also wanted to purchase equipment that you could easily buy at Best Buy or online at Crutchfield.
I went with Alpine equipment because I've had good luck with it in the past, plus the factory head unit is actually an Alpine unit as well.
My total equipment cost was just under $600 including shipping...
DICE iPod integration unit - $150
Alpine Type-S SPS171A 6.5" components - $115
Alpine Type-E SWE-1242 12" subwoofer - $80
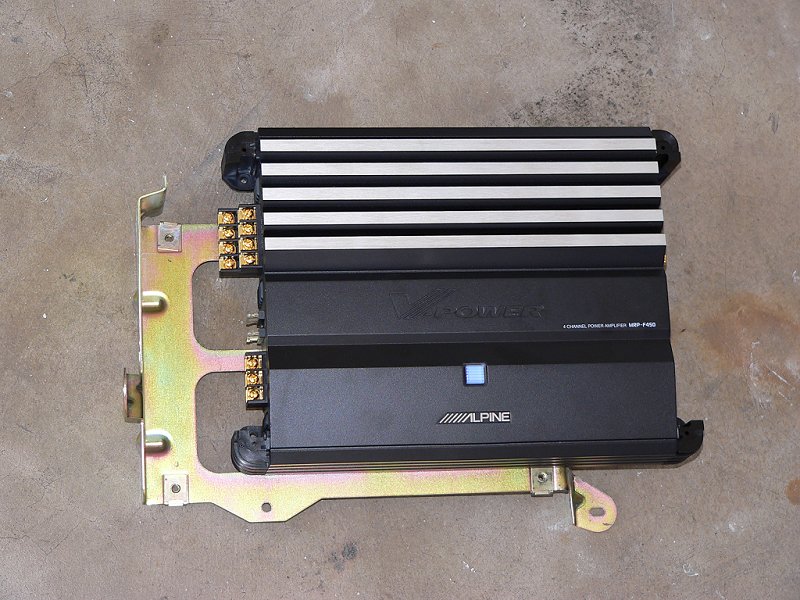
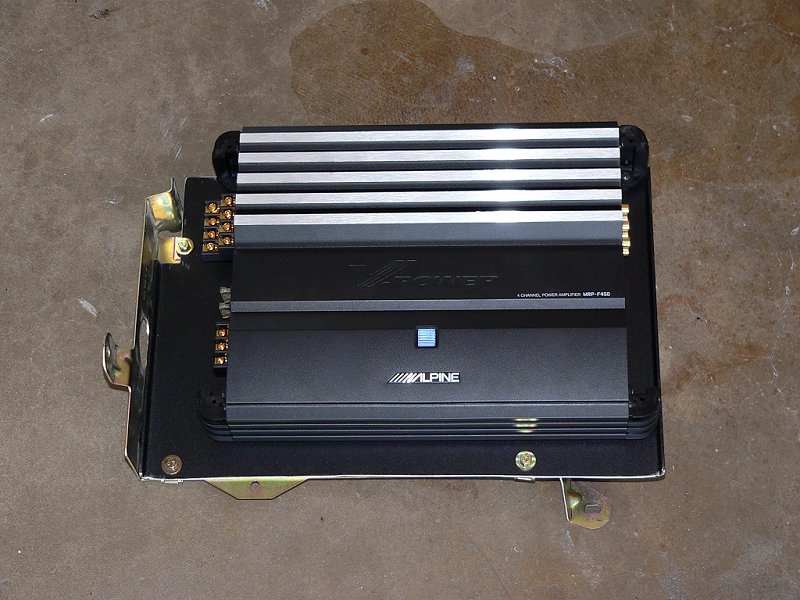
Alpine MRP-F450 4-channel amplifier - $230
Everything was purchased from OnlineCarStereo.com except for the DICE unit, which was purchased from European Auto Source.
The install went pretty well without any major drama, and it sounds pretty damn good, although I know that part is always subjective.
It's definitely a HUGE improvement over the factory DSP system none the less.
There was some concern on which DICE unit I would need since my car has the DSP system, however I would be replacing EVERYTHING but the head unit.
It turns out my car was pre-wired with the analog CD changer cable even though the digital DSP cable (coax) was there.
Once the factory DSP amplifier is disconnected, the head unit reverts back to analog output, so all I needed was the base DICE unit.
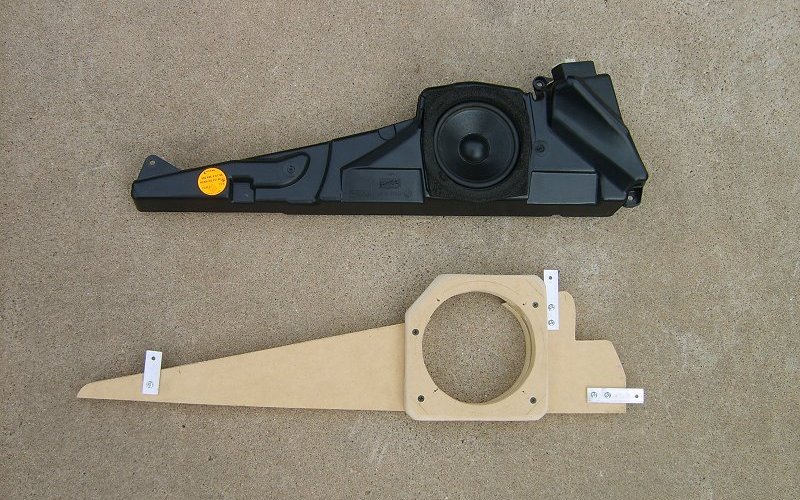
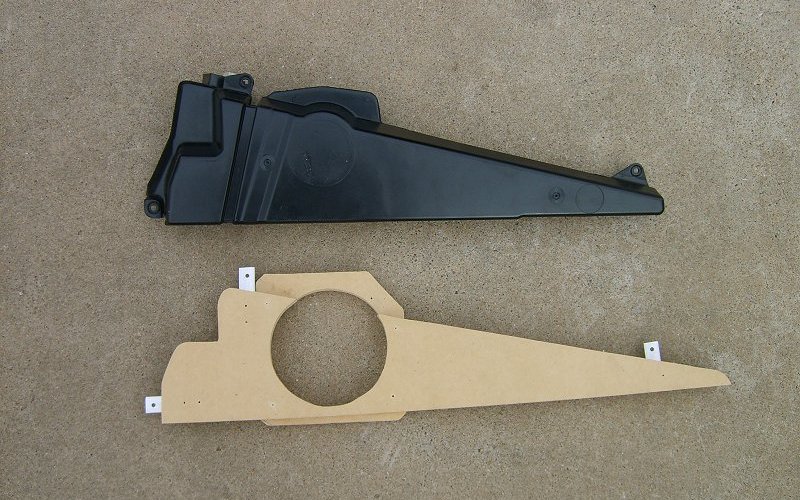
I built a simple sealed box that fit right up against the back seat so the subwoofer could fire through the ski pass-thru (which wasn't optioned in my car, so I cut it out with a sawzall), and I also built some custom panels for the front doors to mount some 6.5" drivers in the front doors (no rear speakers are used).
Both the subwoofer box and the front door panels were made using 3/4" MDF.
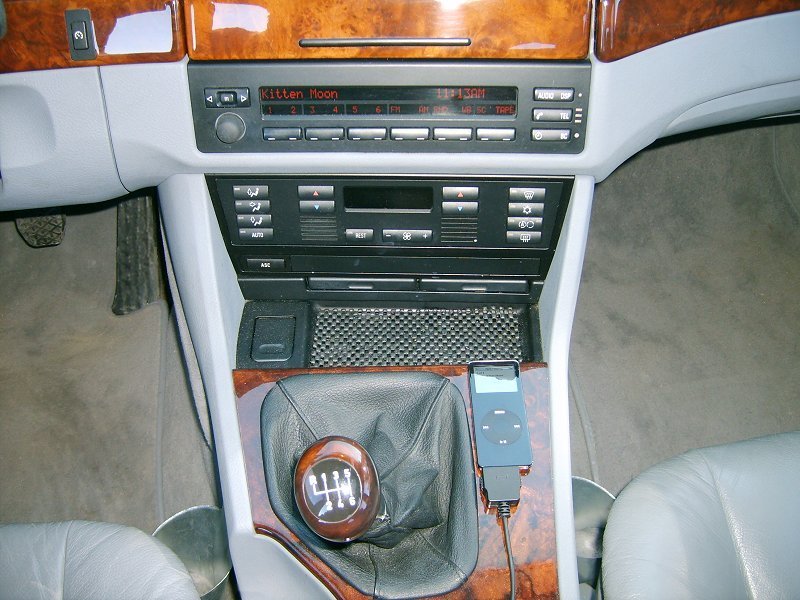
DICE iPod integration takes the place of the factory CD changer and works with the factory headunit.
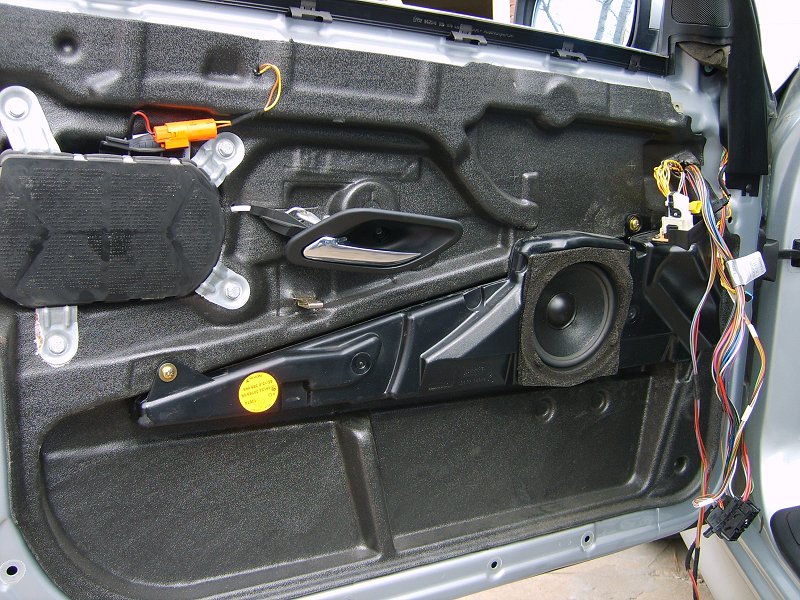
Factory front door 5.25" speaker enclosure compared with new custom replacement panel for 6.5" speaker.
Factory front door 5.25" speaker enclosure installed.
New custom replacement panel with 6.5" speaker installed.
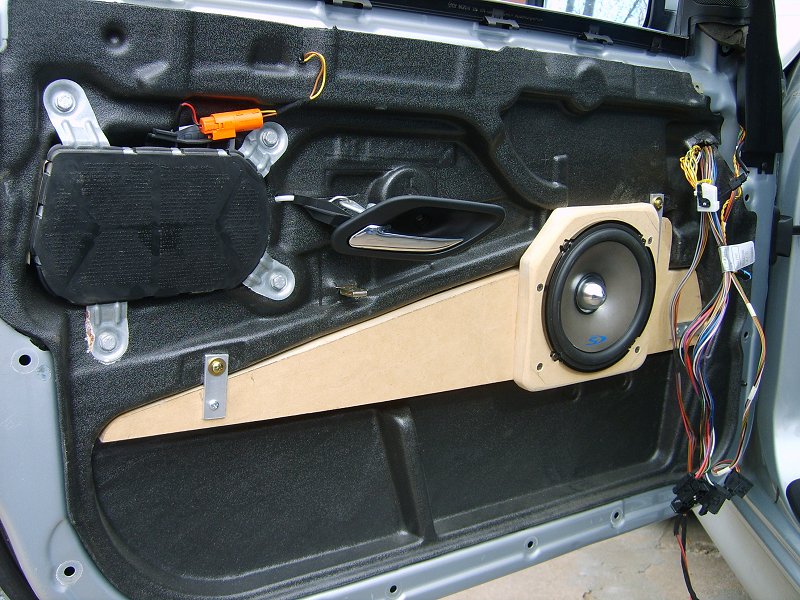
New tweeter installed in front door factory midrange location with custom mount.
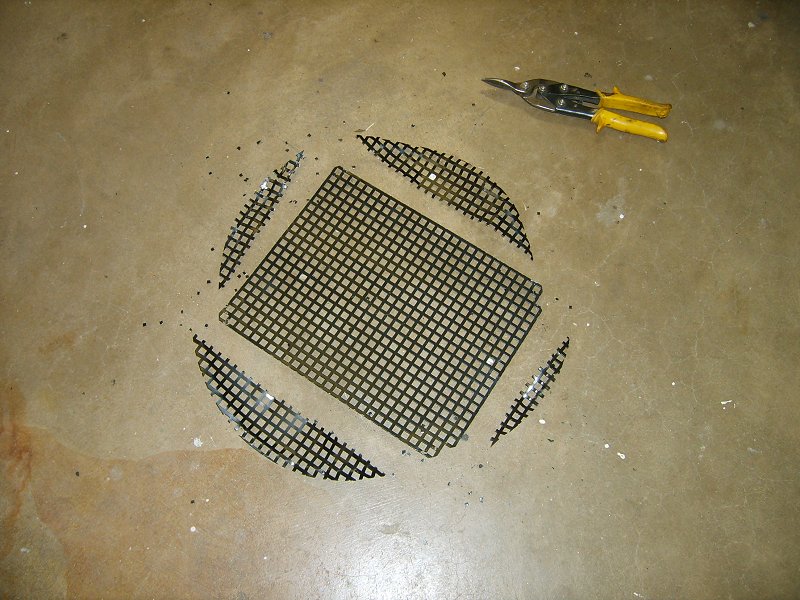
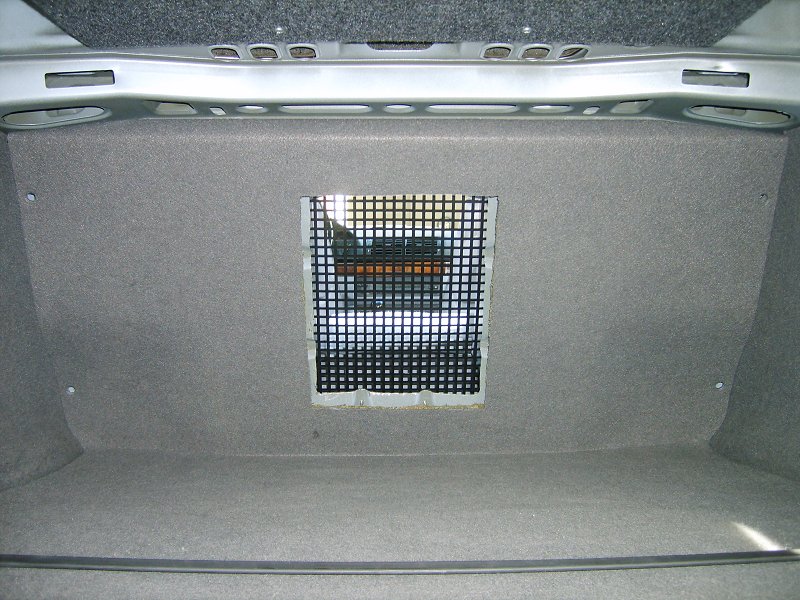
Car was not optioned with ski pass-thru, so a pass-thru was cut out for subwoofer using a sawzall.
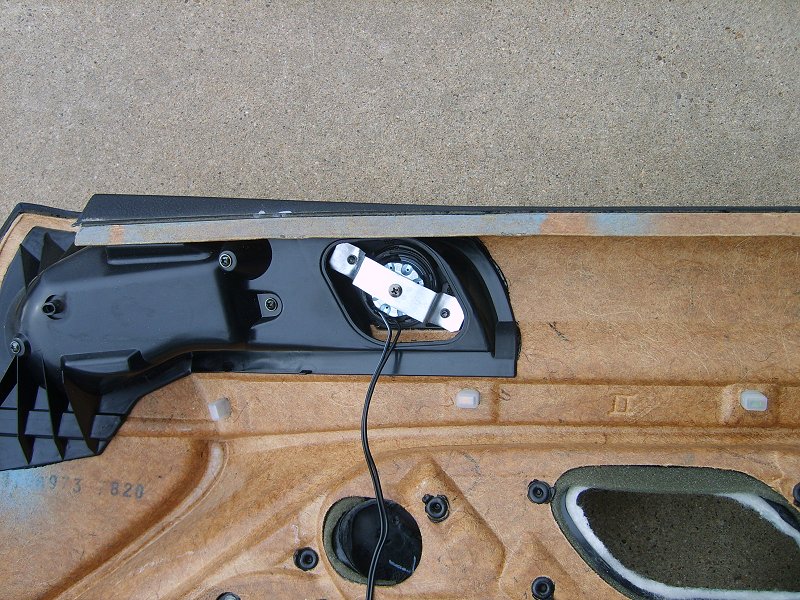
Subwoofer pass-thru grille cut from 15" subwoofer grille.
Grille installed over subwoofer pass-thru hole to keep back seat passengers (kids) from tampering with subwoofer.
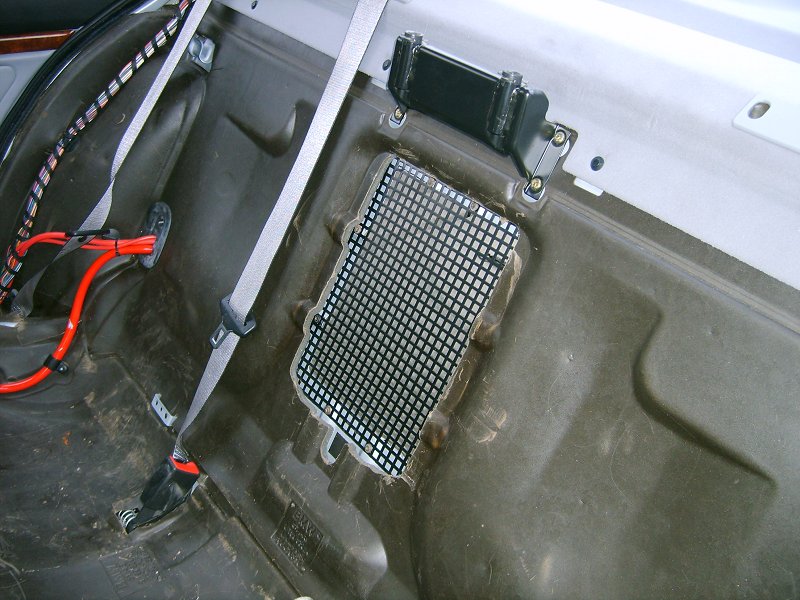
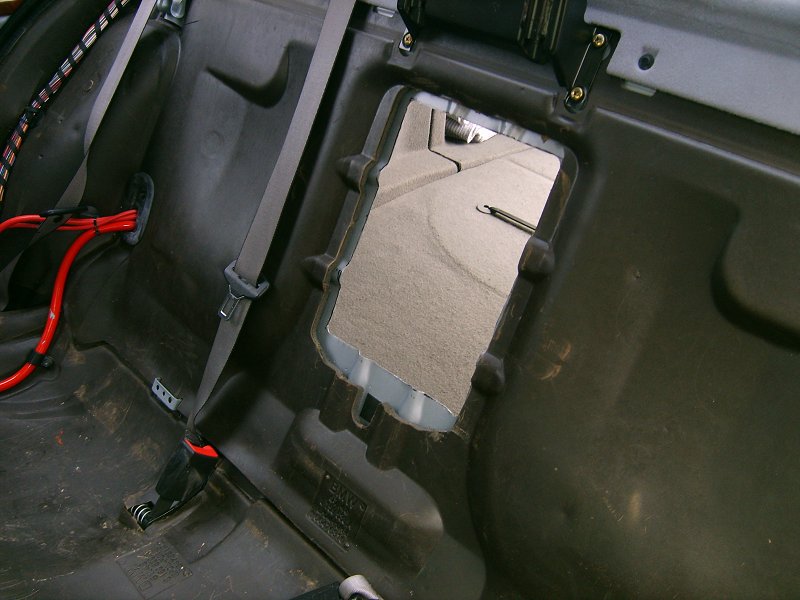
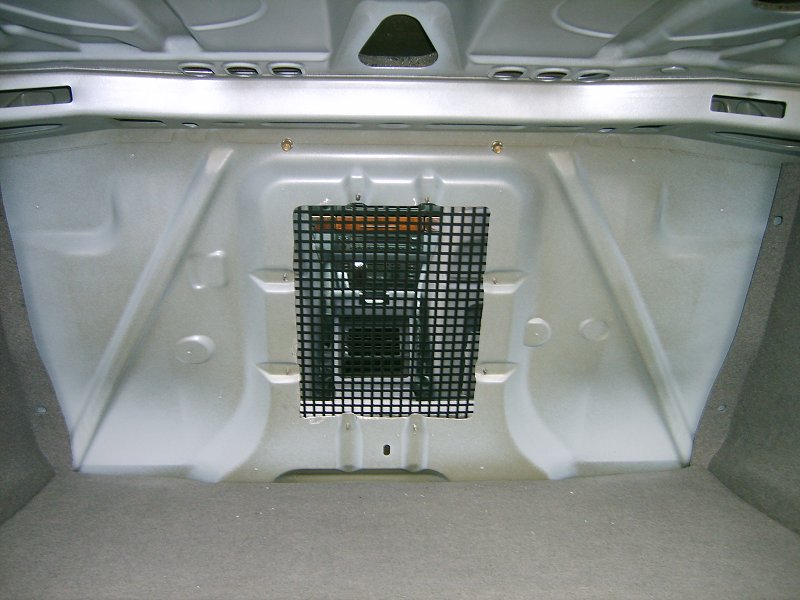
View from trunk of subwoofer pass-thru and grille.
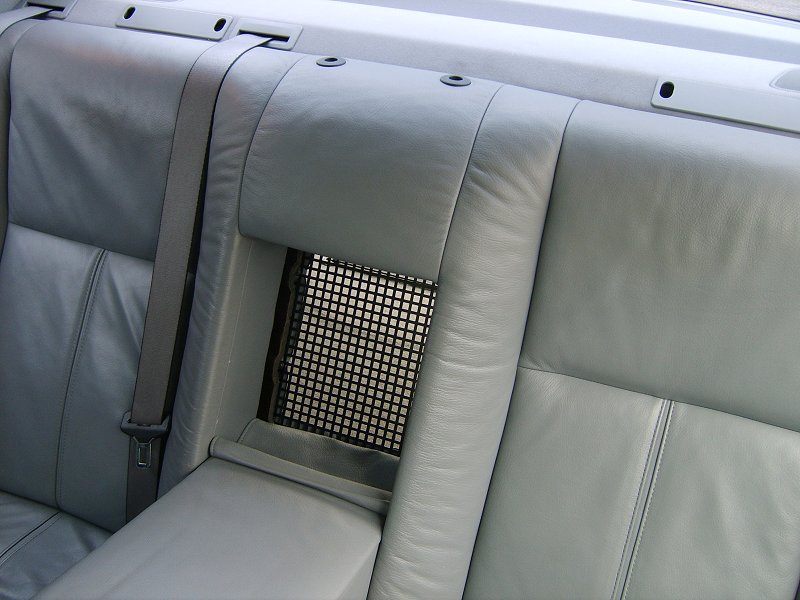
With seat installed and arm rest down.
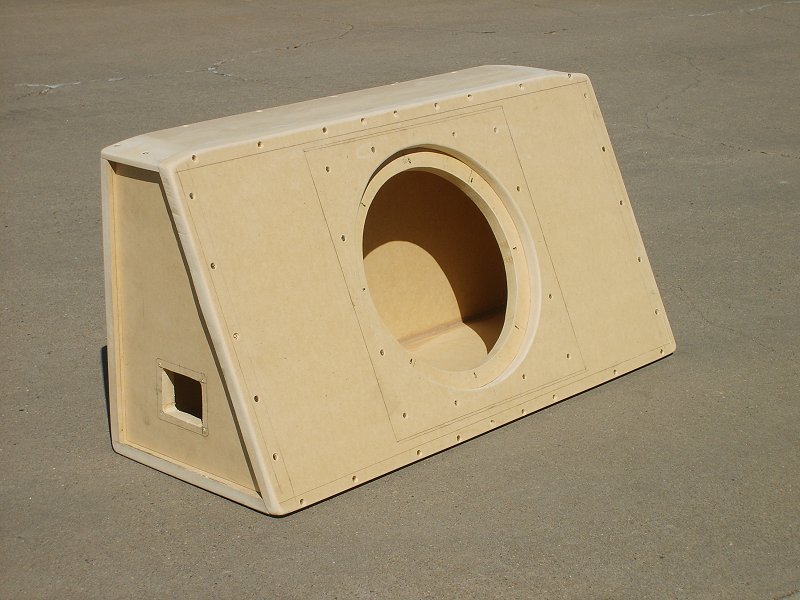
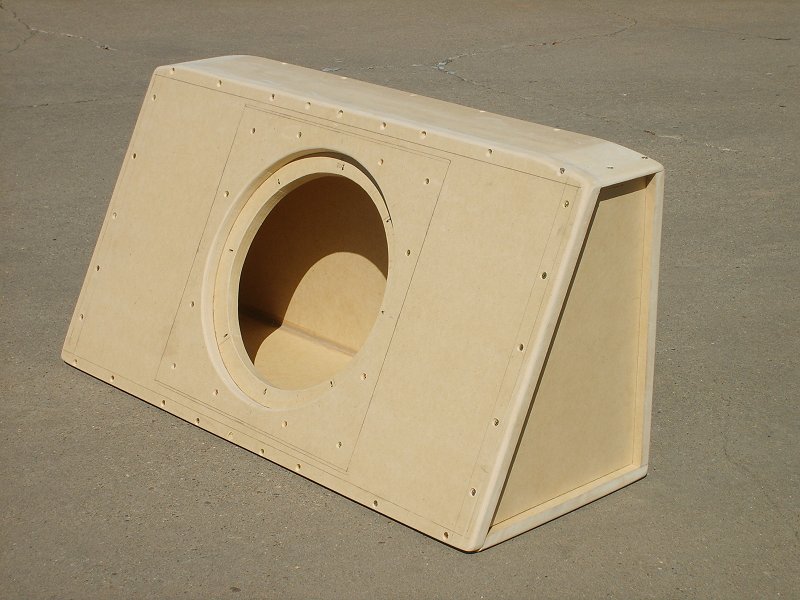
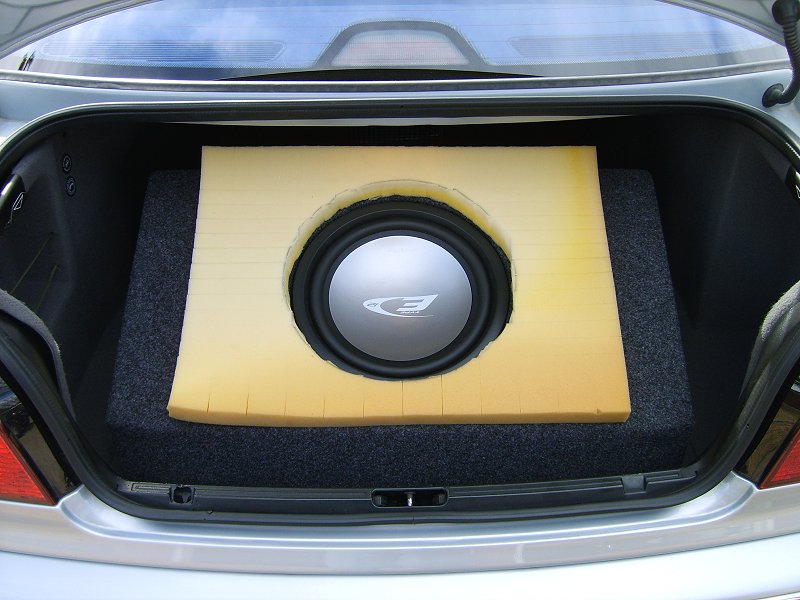
Custom sealed box with flush mount for 12" subwoofer.
(Box Dimensions: W=32", H=16", D1=5.5", D2=13")
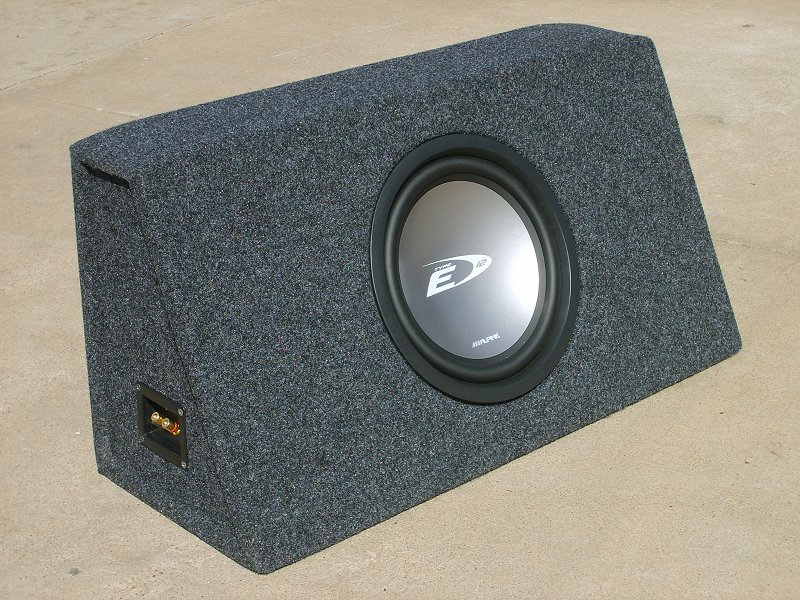
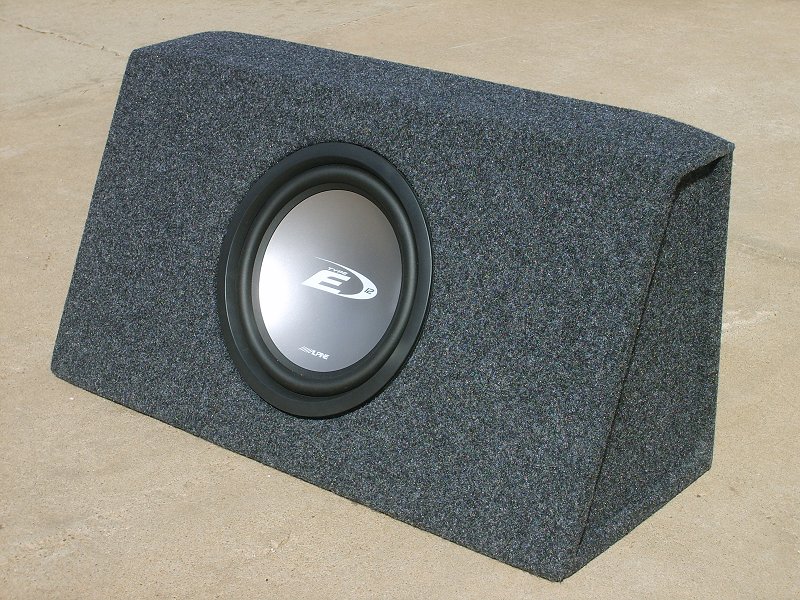
Finished box covered with trunk liner and subwoofer installed.
Factory trunk trim panel cut out for subwoofer pass-thru.
1.5" foam sheet used to seal box to subwoofer pass-thru.
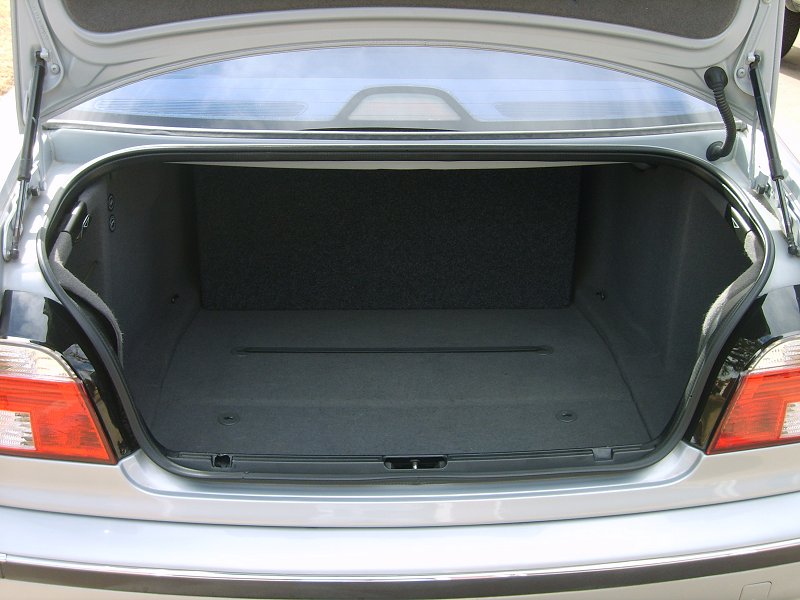
Box installed with plenty of trunk room and allows full access to spare tire.
12" subwoofer centered in pass-thru.

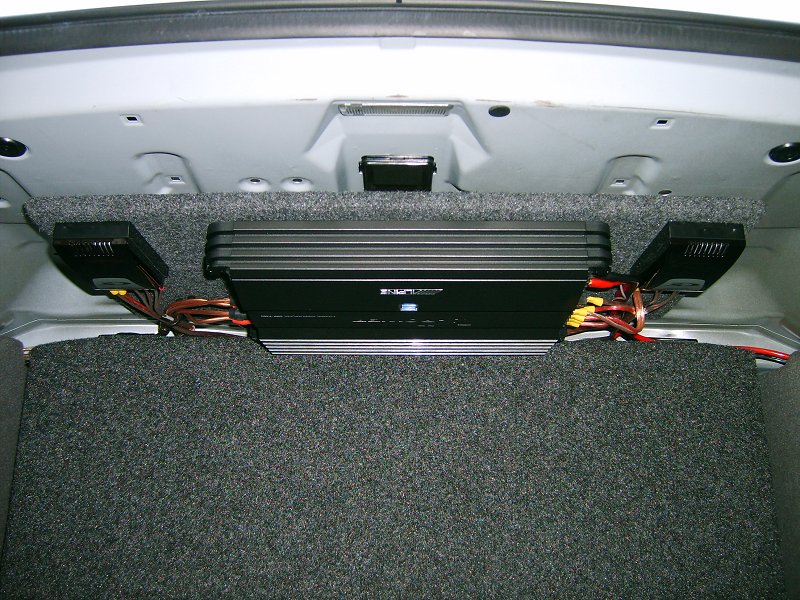
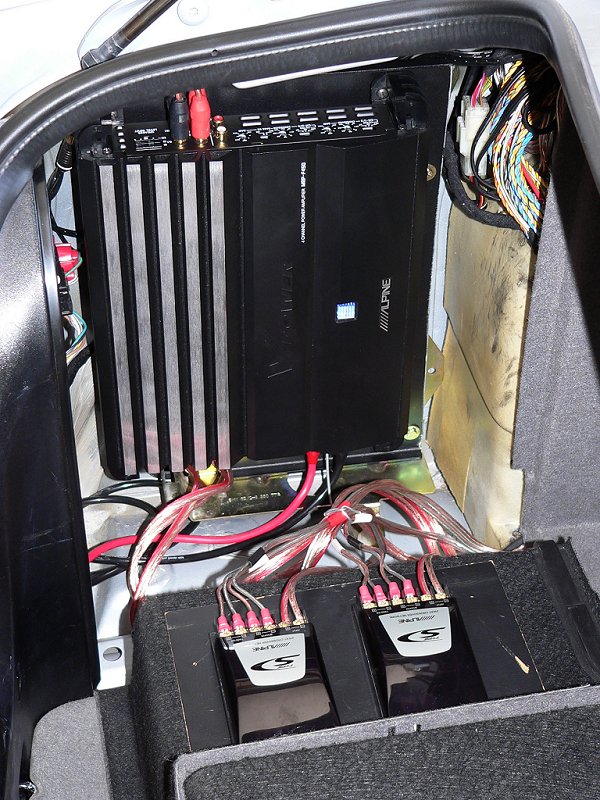
Amplifier and component crossovers installed under rear deck.
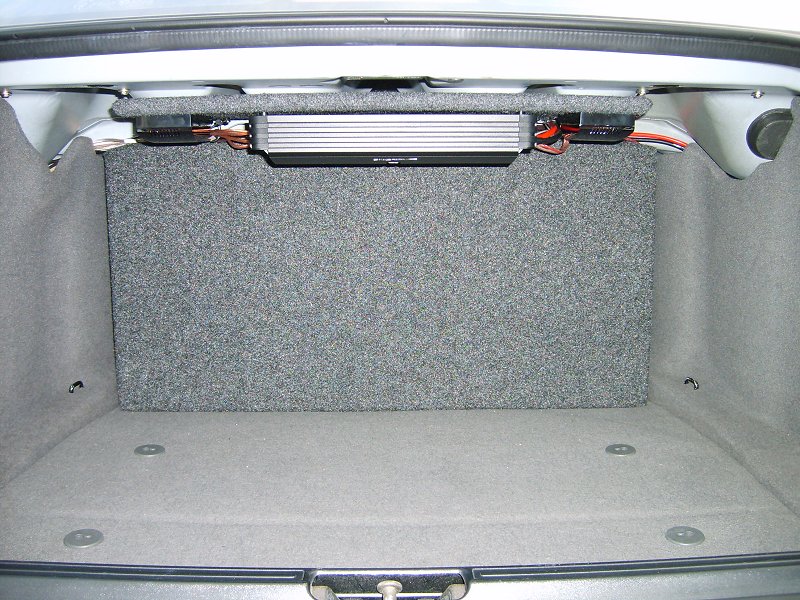
Update: After a few months, the amp was occasionally overheating during extended usage periods (i.e. - road trips)
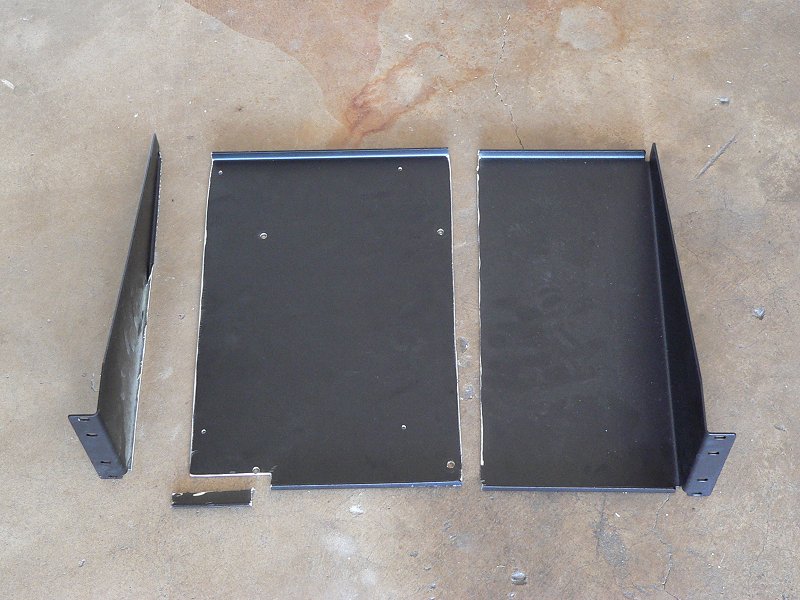
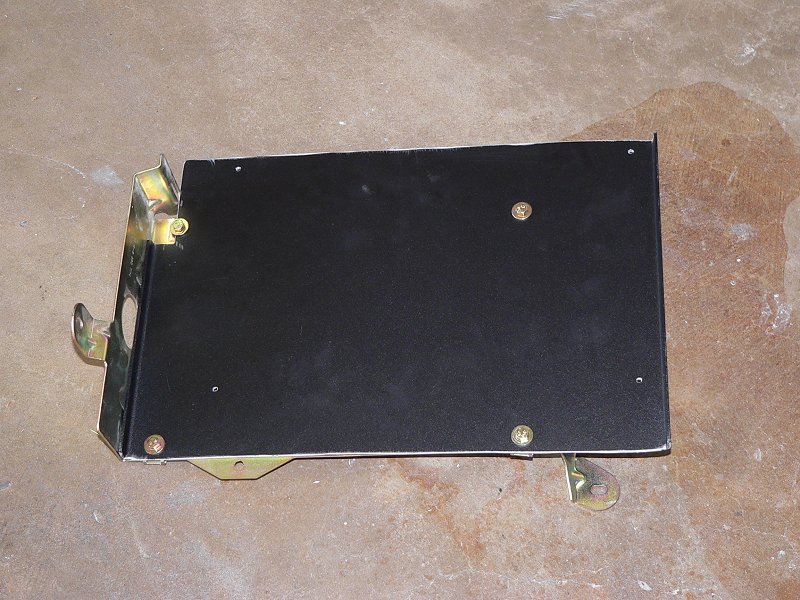
from being mounted upside down, so the amp was moved to the factory amp location using the factory bracket
in conjunction with an adapter plate made from an aluminum network equipment rack shelf.
I tapped into the main audio output from the head unit (at the amplifier end) by splicing the factory wiring into RCA cables, and went straight into the amplifier's pre-amp inputs (bridged to both front and rear inputs with Y-adapters for L and R).
With the DSP amplifier disconnected, this is now a common ground analog signal (I verified the common ground with a multi-meter).
I was a little nervous going this route since I've read that a line output converter must be used due to balanced signals, but it worked great.
This gives a nice clean signal without any alternator whine or turn-on/off thump.
I got the connector, pinout, and color info from reading through various pages on bmwtips.com, specifically these two:
http://www.bmwtips.com/tipsntricks/tips_pages/Soundwirediagram.htm
http://www.bmwtips.com/tipsntricks/tips_images/adsstereowiring.pdf (the L/R head unit output colors are reversed in this pdf)
From the 18 pin connector of the DSP amplifier:
PIN# - CONNECTION - COLOR
08 - RH front (-) common ground - brown/orange
09 - LH front (-) common ground - brown/orange
17 - RH front (+) output from radio - blue/red
18 - LH front (+) output from radio - yellow/red
The rear outputs are not present in the amplifier connectors or in the head unit connector harness with a DSP system, but the pins can be added to the head unit connector harness if f-to-r fading capability is necessary.
I also tapped into the factory speaker wiring at the factory amplifier's harness.
From the 26 pin connector of the DSP amplifier:
PIN# - CONNECTION - COLOR
01 - LH front (+) woofer - yellow/red
02 - LH front (-) woofer - yellow/brown
04 - RH front (-) mid-range - blue/brown
05 - LH front (+) mid-range - yellow/white
09 - RH front (+) mid-range - blue/white
10 - LH front (-) mid-range - yellow/brown
13 - RH front (+) woofer - blue/red
26 - RH front (-) woofer - blue/brown
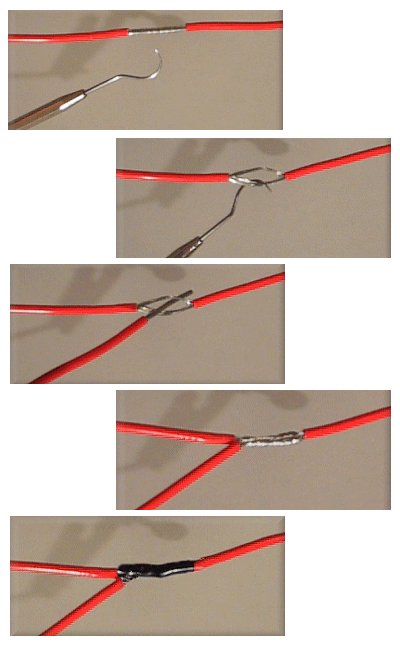
All of the connections are just tapped using the method in the pic below, leaving the factory connectors intact so that I can easily go back to the factory system if/when it comes time to sell the vehicle.
Also... here is the factory remote turn on wire...
From the 15 pin connector of the DSP amplifier:
PIN# - CONNECTION - COLOR
04 - Radio on/antenna signal - violet/white
Wire tapping method used...